The SOL-X GeoFence feature allows supervisors and team leaders to create, manage, and monitor virtual safety zones on the vessel. GeoFences ensure real-time situational awareness for crew members and streamline visibility of ongoing operations.
This article outlines the process for manually creating GeoFences, managing their lifecycle, and understanding the landing page interface.
1. Creating a Manual GeoFence
Manual GeoFences are typically used to demarcate operational zones that may not have automated triggers. Here’s how to create one:
Step-by-Step Instructions:
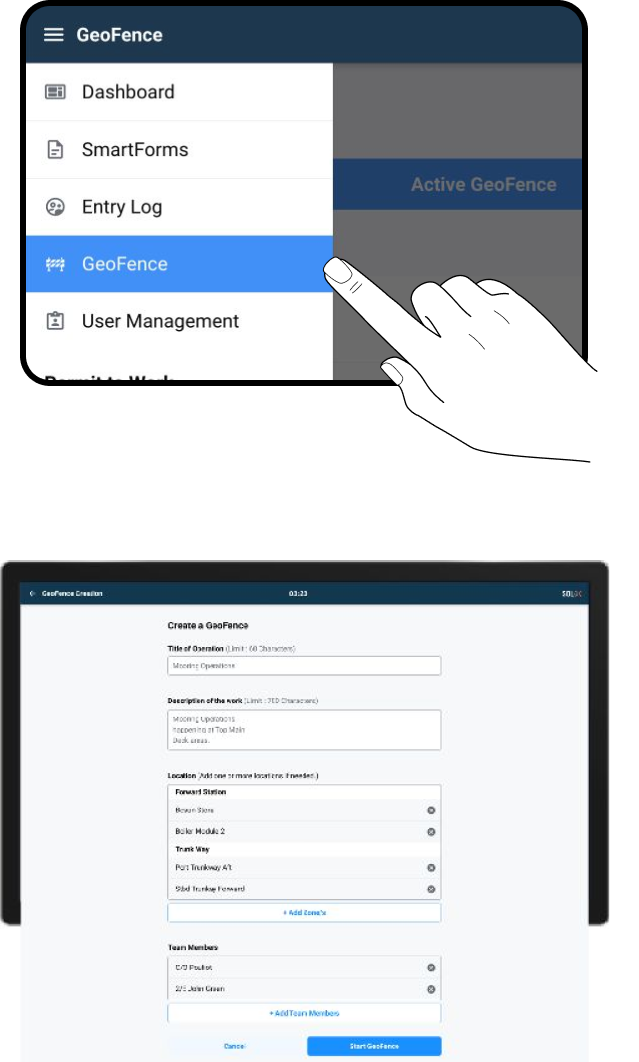
Navigate to the GeoFence Creation page from the Dashboard.
Fill in the required fields:
Title of Operation
Description of Work
Location
Team Members
Under Location, select:
The primary area (e.g., Forward, Aft)
Then select zones relevant to that area (e.g., Control Room, Engine Bay)
You can add multiple zones by tapping the “+ Add Zone/s” button
Under Team Members:
Tap on “Select Team Members”
Choose all involved personnel (multi-select is supported)
Tap “Confirm” once all fields are populated.
Tap “Start GeoFence” to activate it.
The GeoFence icon will appear immediately on the dashboard map view.
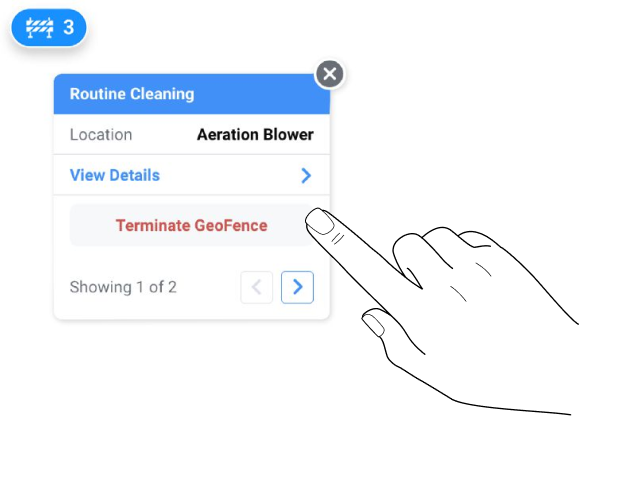
2. Terminating a GeoFence
Once the task is complete, the GeoFence should be removed to prevent outdated alerts.
Tap on “Terminate GeoFence” for manually created zones.
This action removes the GeoFence from the live map and archives its record in the GeoFence Landing Page under historical logs.
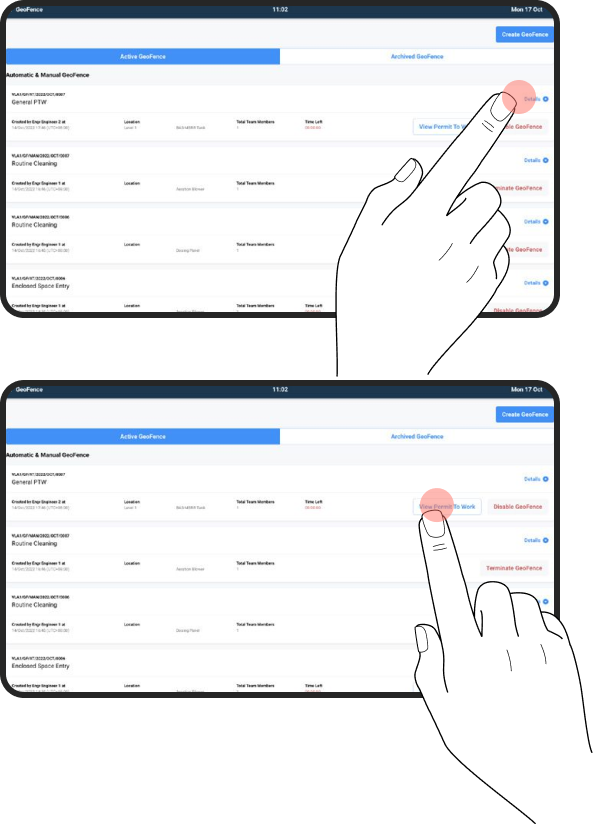
3. GeoFence Landing Page Overview
You can access the GeoFence module from the left-hand menu on the tablet/dashboard.
The Landing Page includes:
Tabs:
Active GeoFences: Shows all ongoing auto/manual zones
Archived GeoFences: Past/terminated zones
Key Functions:
Details: Tap the dropdown arrow on any card to view the full operation description and assigned team.
View Permit to Work: For automatic GeoFences linked to PTWs, this opens the PTW page (requires PIN).
Disable GeoFence: This suspends the active alert for an ongoing PTW, but does not delete it.
You can re-enable a disabled GeoFence as long as the PTW is active and not terminated.
Best Practices
Always define clear and accurate zone selections to prevent alert overlap.
Ensure team members are added during creation for better tracking.
Terminate GeoFences when no longer required to avoid dashboard clutter.
Use the View Details button to periodically audit team responsibilities and task zones.
Was this article helpful?
That’s Great!
Thank you for your feedback
Sorry! We couldn't be helpful
Thank you for your feedback
Feedback sent
We appreciate your effort and will try to fix the article